Texture Atlasing
On this page
Gameface provides support for texture atlasing, allowing you to batch multiple UE textures in a larger one and sample from it, instead of binding different textures on every draw call. Grouping textures used in the same screen in your UI will provide for more batching and improve performance, especially on mobile devices.
Overview
The feature is accessible from the Gameface submenu and from the Content Browser. The Atlas Viewer and Atlas Preview windows, along with the context menu extensions are the tools you can use to manage your atlases.
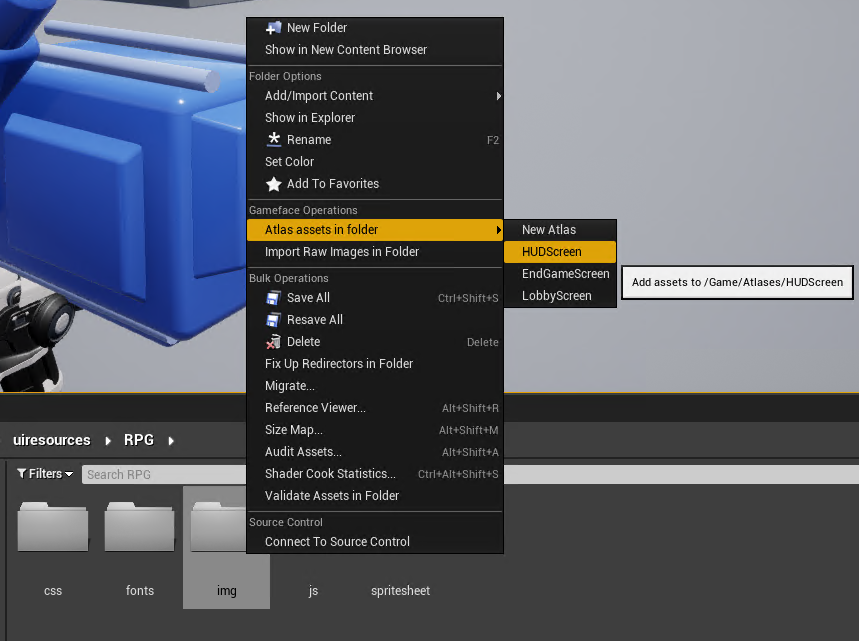
Adding a new atlas
Adding a new atlas can be done in the following ways:
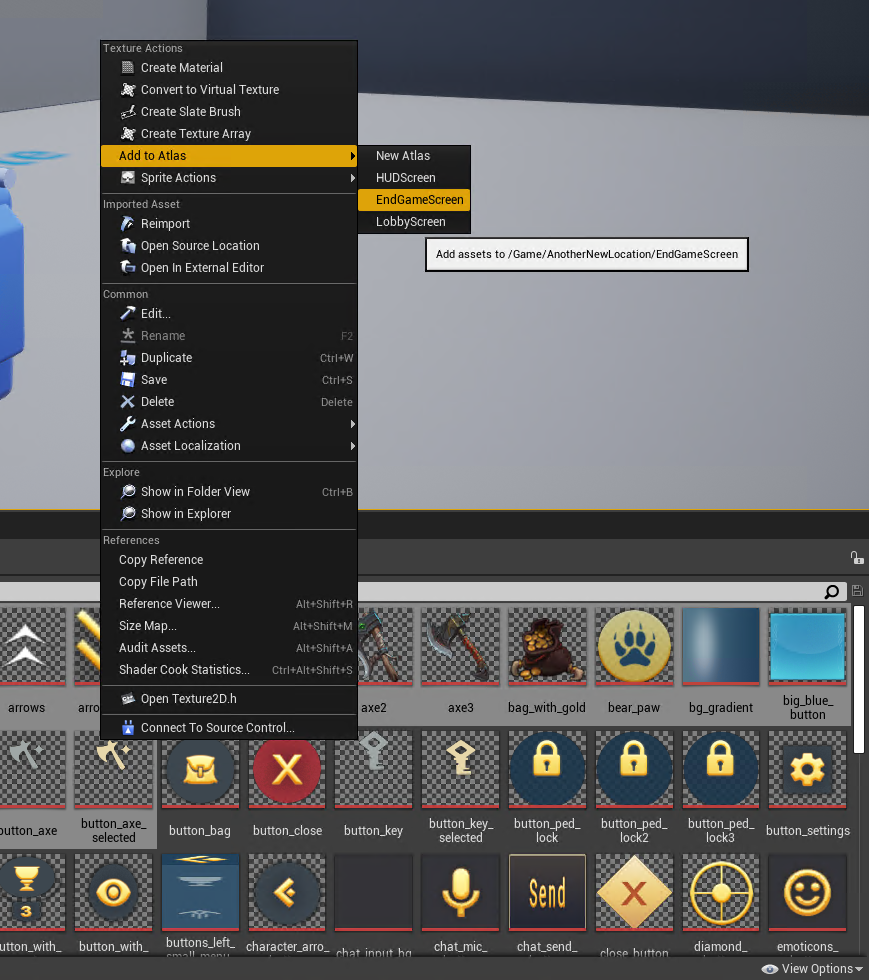
- From the plus button in the
Atlas Viewer - By selecting one, or more assets in the
Content Browser, right-clicking and choosing Add to atlas - By selecting one or more folders in the
Content Browser, right-clicking and choosing Atlas assets in folder
The first approach will create an empty atlas, which you can then populate with textures. The second and third approaches can add the textures to either a new, or an existing atlas.
Renaming an atlas
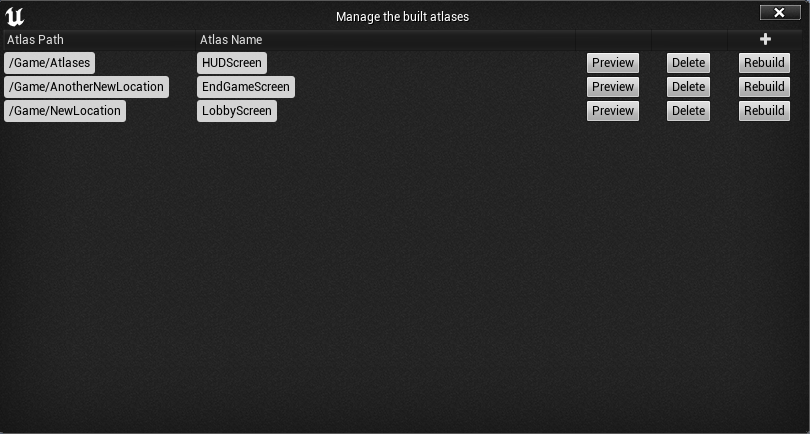
New atlases are always created with default names. To rename an atlas, you can use the Atlas Name field in the Atlas Viewer window.
Deleting an atlas
The Atlas Viewer window also allows you to delete an atlas, which is no longer used via the Delete button.
Modifying an atlas' parameters
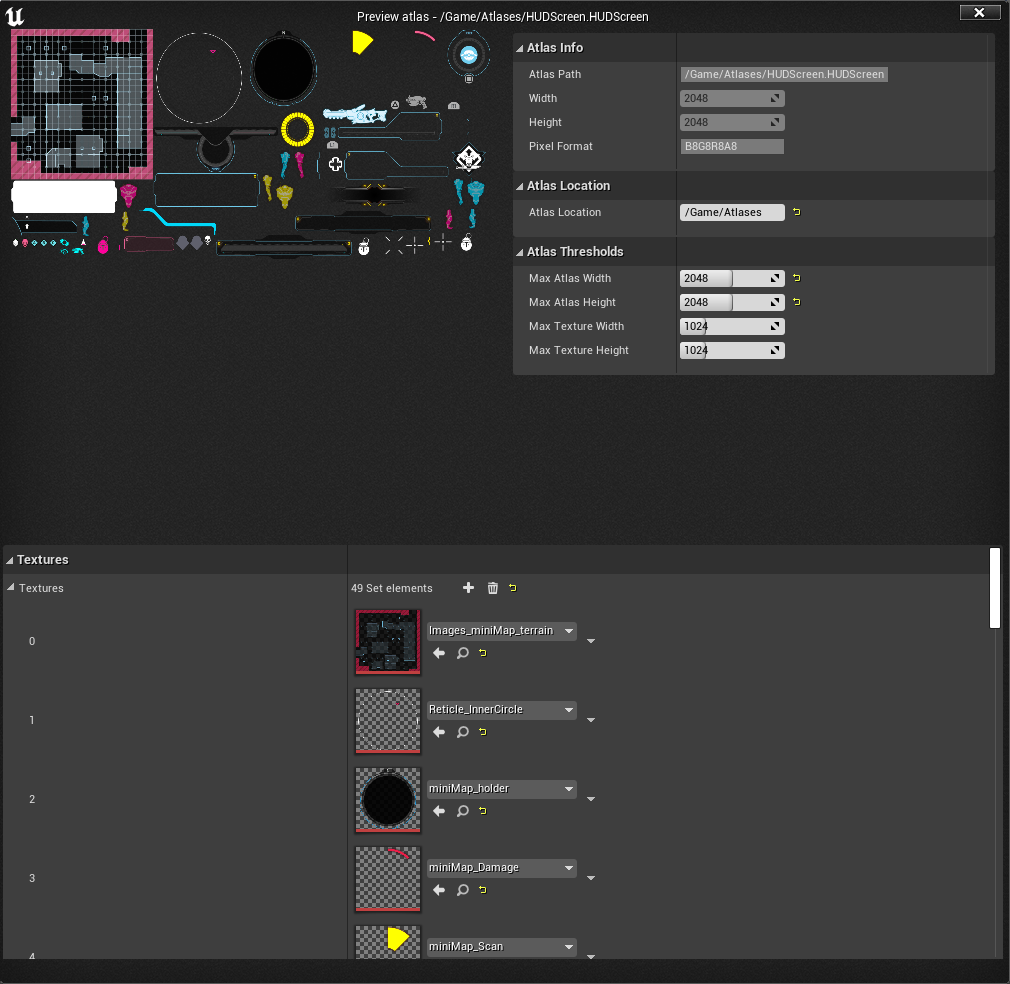
The Preview button in the Atlas Viewer window opens the preview window, from where you can edit an already existing atlas. The properties that you can modify include:
- The textures which the atlas contains
- The maximum atlas dimensions
- The maximum dimensions of a texture that can be included in the atlas (textures exceeding these dimensions will be dropped from the atlas)
Changing atlas locations
By default atlases will be created under Content/Atlases, however if you need to change this location, it can easily be done either by changing the Atlas Path field in the Atlas Viewer window, or by changing the Atlas Location field in the Atlas Preview window.
Packaging and source control
All atlases are saved to and loaded from the Content/Atlases folder of your project, along with the atlas metadata (i.e. which asset is contained in which atlas, and where its region is in that atlas). That same directory is automatically set to always be cooked and staged, so that the atlas assets and metadata are available in a packaged game. You can keep the entire folder under source control and update it when you add, remove, or modify an atlas.
Alternatively, you may have changed the location of one or more atlases, in which case the atlas metadata file will still remain under Content/Atlases and contain the other locations for each created atlas. Cooking of new atlas locations has to be either manually added in your project’s packaging settings (by opening Project Settings, then navigating to Packaging settings and adding the location to the Additional Asset Directories to Cook list), or you can use our option to automatically package new atlases (this option is disabled by default).

For example, given the first screenshot from this section, apart from Game/Atlases, there are Game/NewLocation and Game/AnotherNewLocation. In this case these locations were changed with our automatic packaging option enabled, which resulted in the following settings being applied:
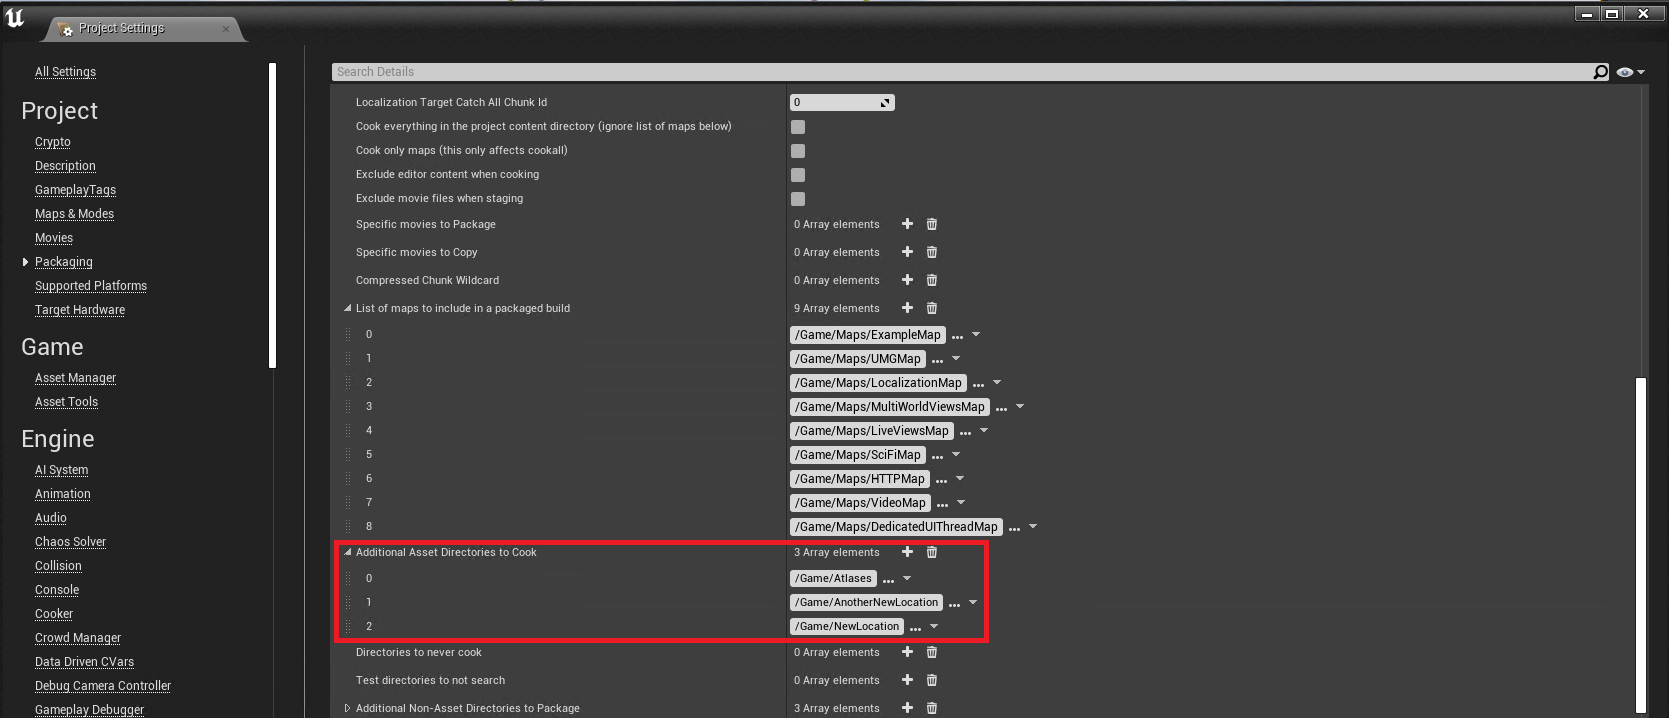
Additional Asset Directories to Cook list of your project’s Packaging Settings.Additional Asset Directories to Cook list automatically. If the directory got renamed, the old path will be removed and replaced with the new one.Details
We keep track of the atlased textures and rebuild the corresponding atlas every time they are modified in any way - re-saved, re-imported, deleted, etc. In order for this metadata to be preserved between Editor runs and used in the Runtime module of our plugin, we utilize UE’s serialization to store it in a binary file named AtlasMappingData.cohtmlamd, inside the Content/Atlases folder of your project. This metadata file stores information about each atlased texture’s Atlas Path, Width, Height, ContentRectWidth, ContentRectHeight, OriginX and OriginY.
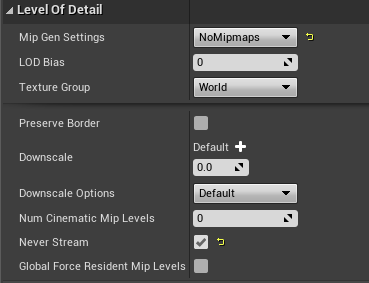
ContentRectWidth and ContentRectHeight values in Gameface versions prior to 1.15.0, so a metadata file created in such versions can’t be used in versions after 1.14.0. This means you will have to manually delete both the metadata and your .uasset Atlas files (since the new metadata file won’t have information about them), and then recreate your Atlases.You can modify the individual atlas settings by opening an atlas file as a normal UTexture in the UE Editor. Even after rebuilding the atlas, these textures will be preserved, with the exception of the texture Compression Settings, which are expected to be set to VectorDisplacementmap(RGBA8), and will be changed back to that value every time the atlas is rebuilt.
.tga format due to artifacts in the transparent areas of the image that other formats have after being imported in UE.Atlas Viewer window. The same rule applies when a page in your UI uses the asset - it will be loaded from the last atlas, to which it was added. If you want to have such functionality, you can subclass our FCohtmlFileHandler and extend it to support such use cases.