Live Views
On this page
The Live View feature allows dynamic textures rendered by Unreal to be embedded in the UI. Obvious applications of this feature include creating 3D player portraits, equipment screens, or rear-view mirrors. It can also be used to achieve more complex effects - such as adding particles, or complex 3D content to the UI.
A complete sample can be found in the LiveViewsMap level that comes with the CoherentSample game distributed in the package.
Setting up and using Live Views in Unreal Engine is straightforward. The Live View is added with an <img> element:
<img id="myLiveView" src="TextureRenderTarget2D\'/Game/LiveViews/LiveViewRT.LiveViewRT\'">
The image source must be a reference to an Unreal Render Target 2D asset. To create such an asset:
- In the Editor, right click and select Materials & Textures -> Render Target
- Set the texture’s size
- Disable HDR
- Set the gamma value of the texture to 2.2 (Gameface does no gamma correction)
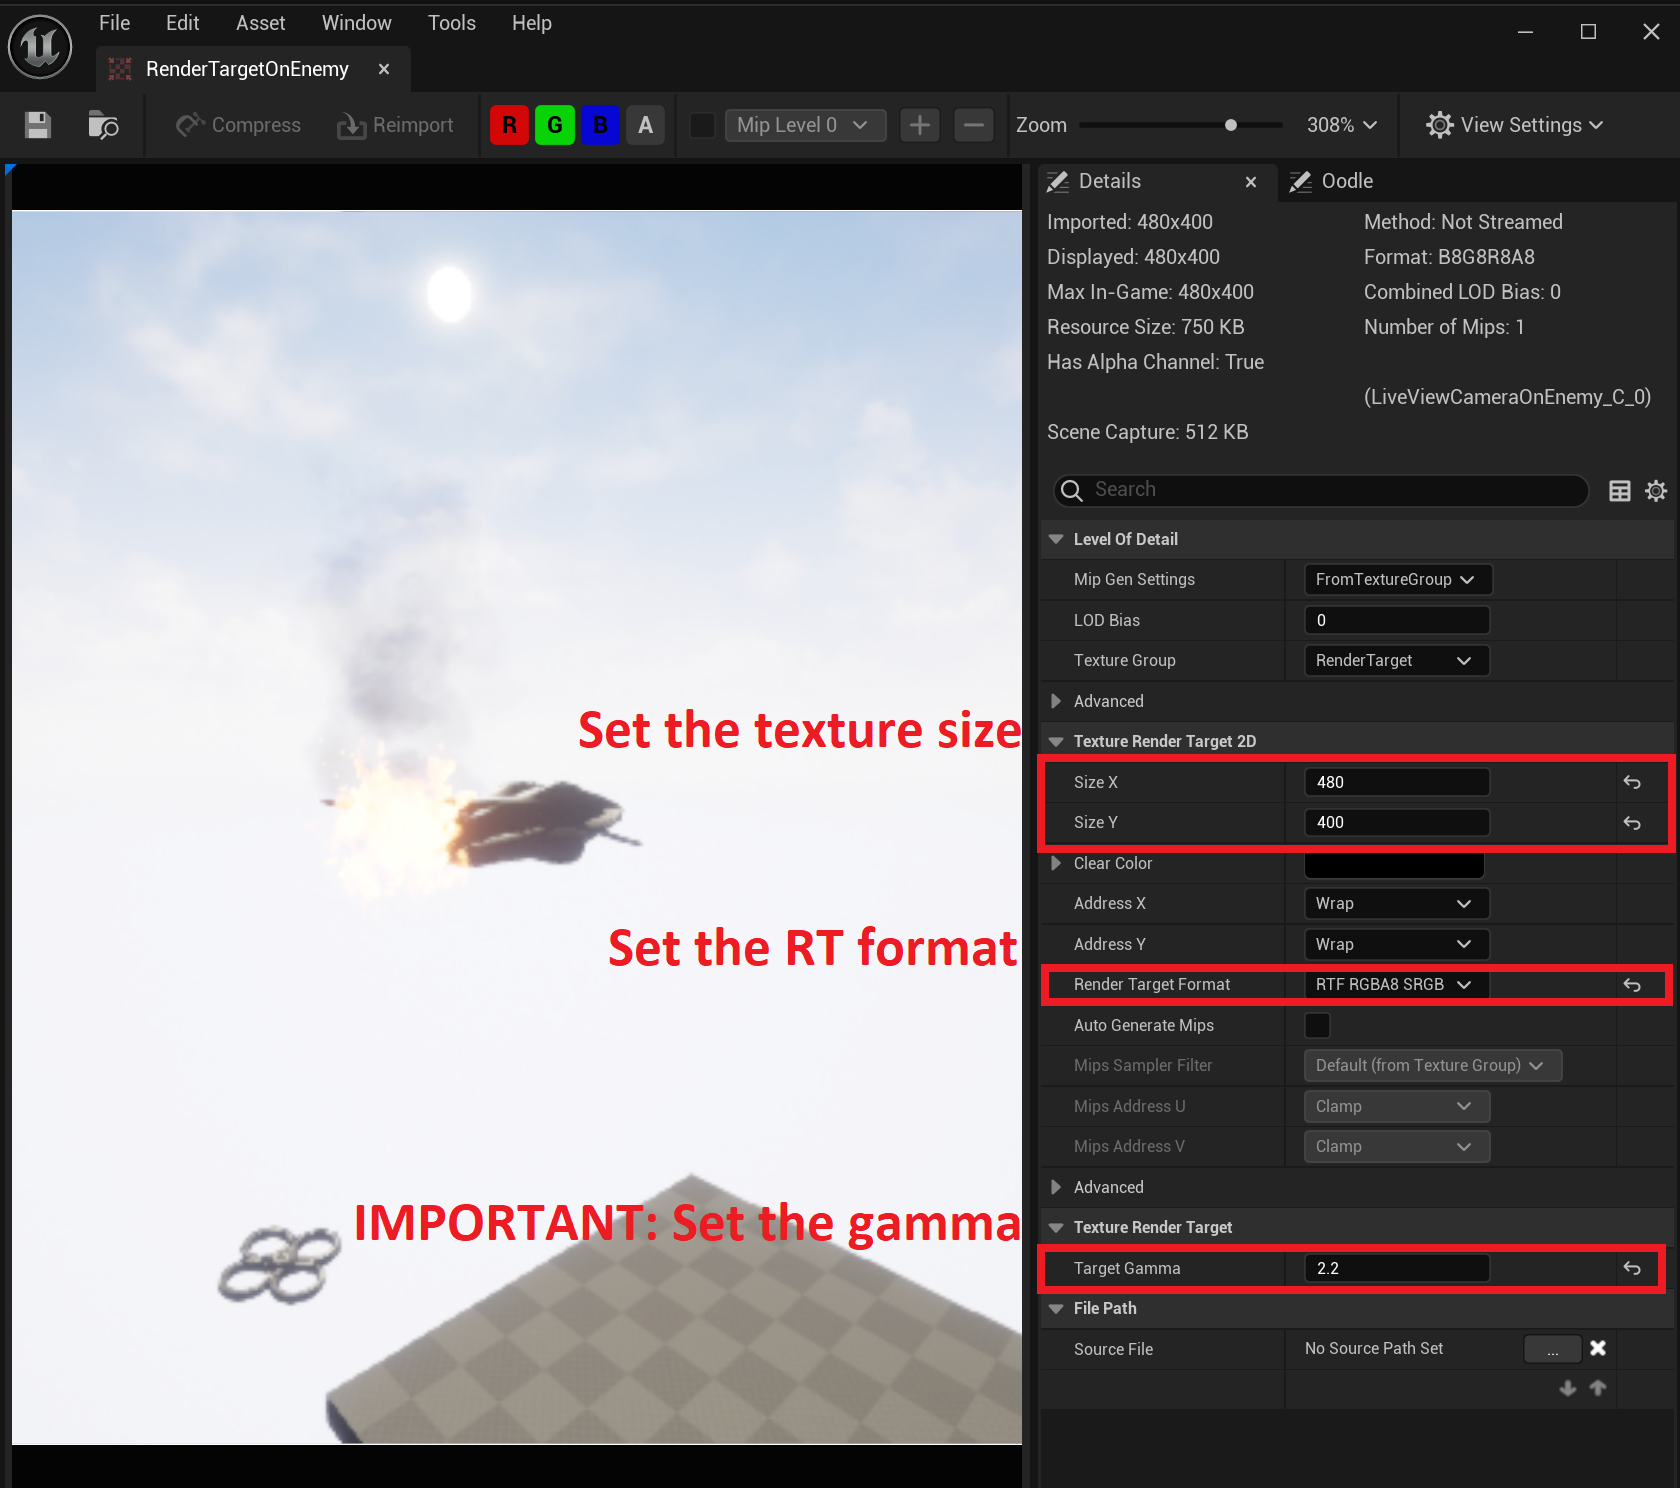
- Save the asset
- Right click on it and select Copy Reference
- Paste the link as source for the
<img>tag
There are many ways to draw in the Render Target. The simplest one is to use an Unreal Engine Camera with a SceneCaptureComponent2D Component. The camera will render what it captures in the world on the Render Target that will then be rendered in the UI.
In the Content Browser, add a new Blueprint and set its parent to CameraActor. Edit the Blueprint and add a SceneCaptureComponent2D. Then set the Texture Target to the one that will be used by the Live View and set the Capture Source to Final Color.
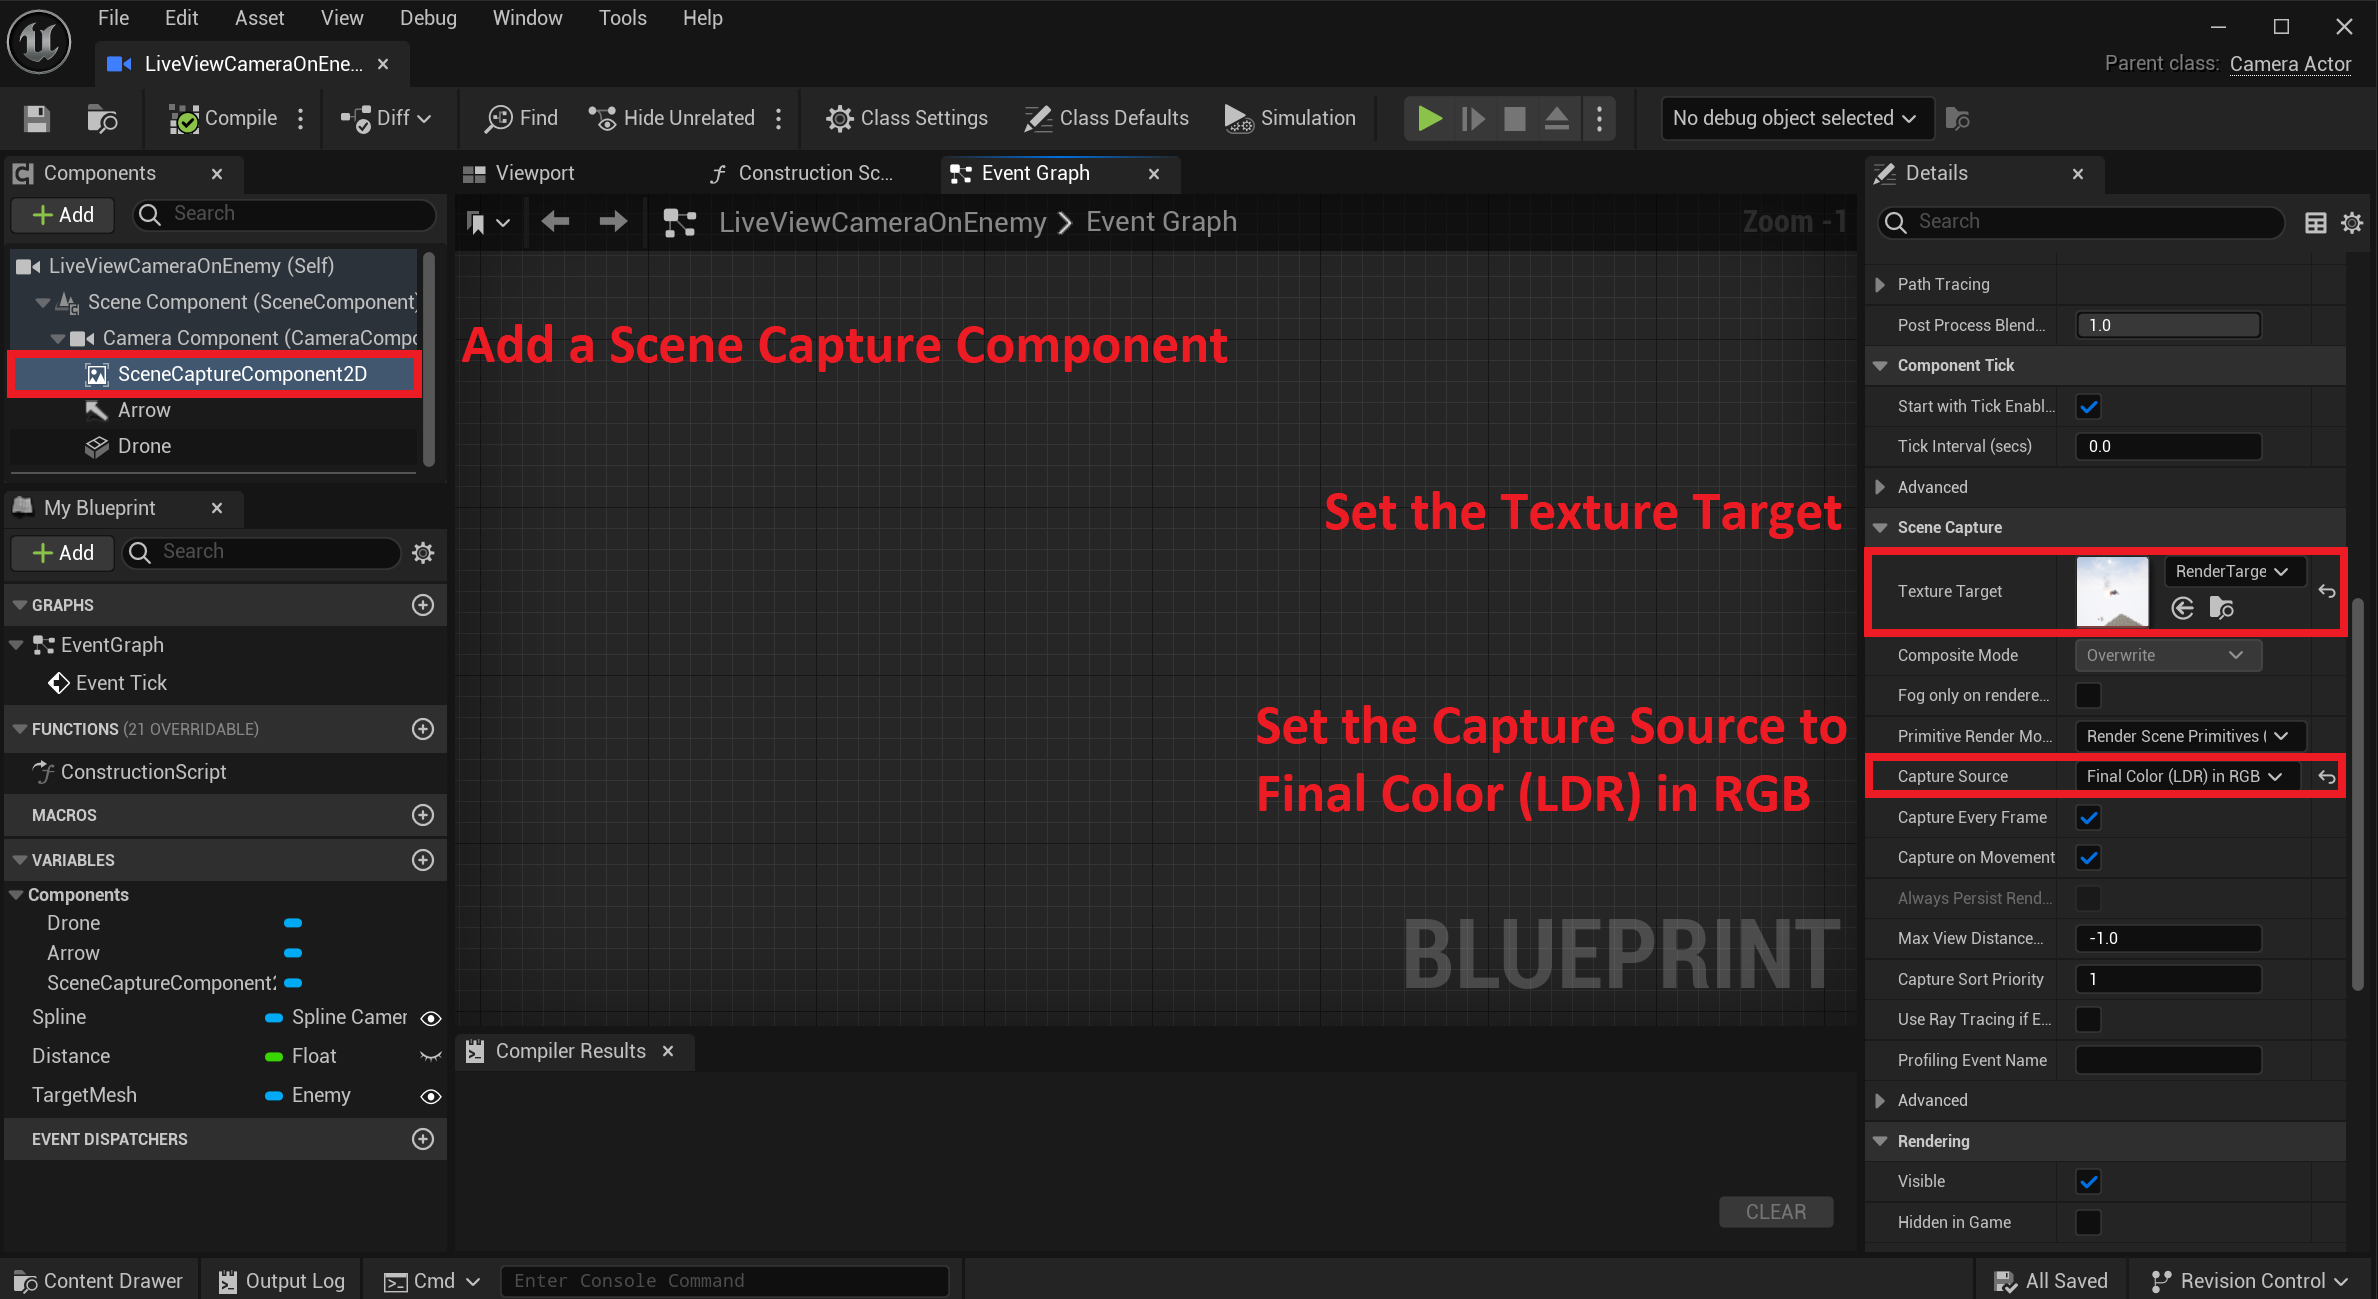
When the level is loaded, everything that is rendered by the camera will also be available in the UI. The Live View inside the interface will be automatically updated. The Live View also has all the properties of a normal image and can be manipulated in similar ways - e.g. by applying filters, animating it, etc.
Transparent Live View Textures
Live Views can also be used to display textures with transparent Components - e.g. a portrait of the player character with no background behind it.
To create a transparent Live View, create a camera Component in the scene with a SceneCaptureComponent2D Component. In the example screenshots we configured the Component to capture the default mannequin that comes with Unreal’s Starter Content.
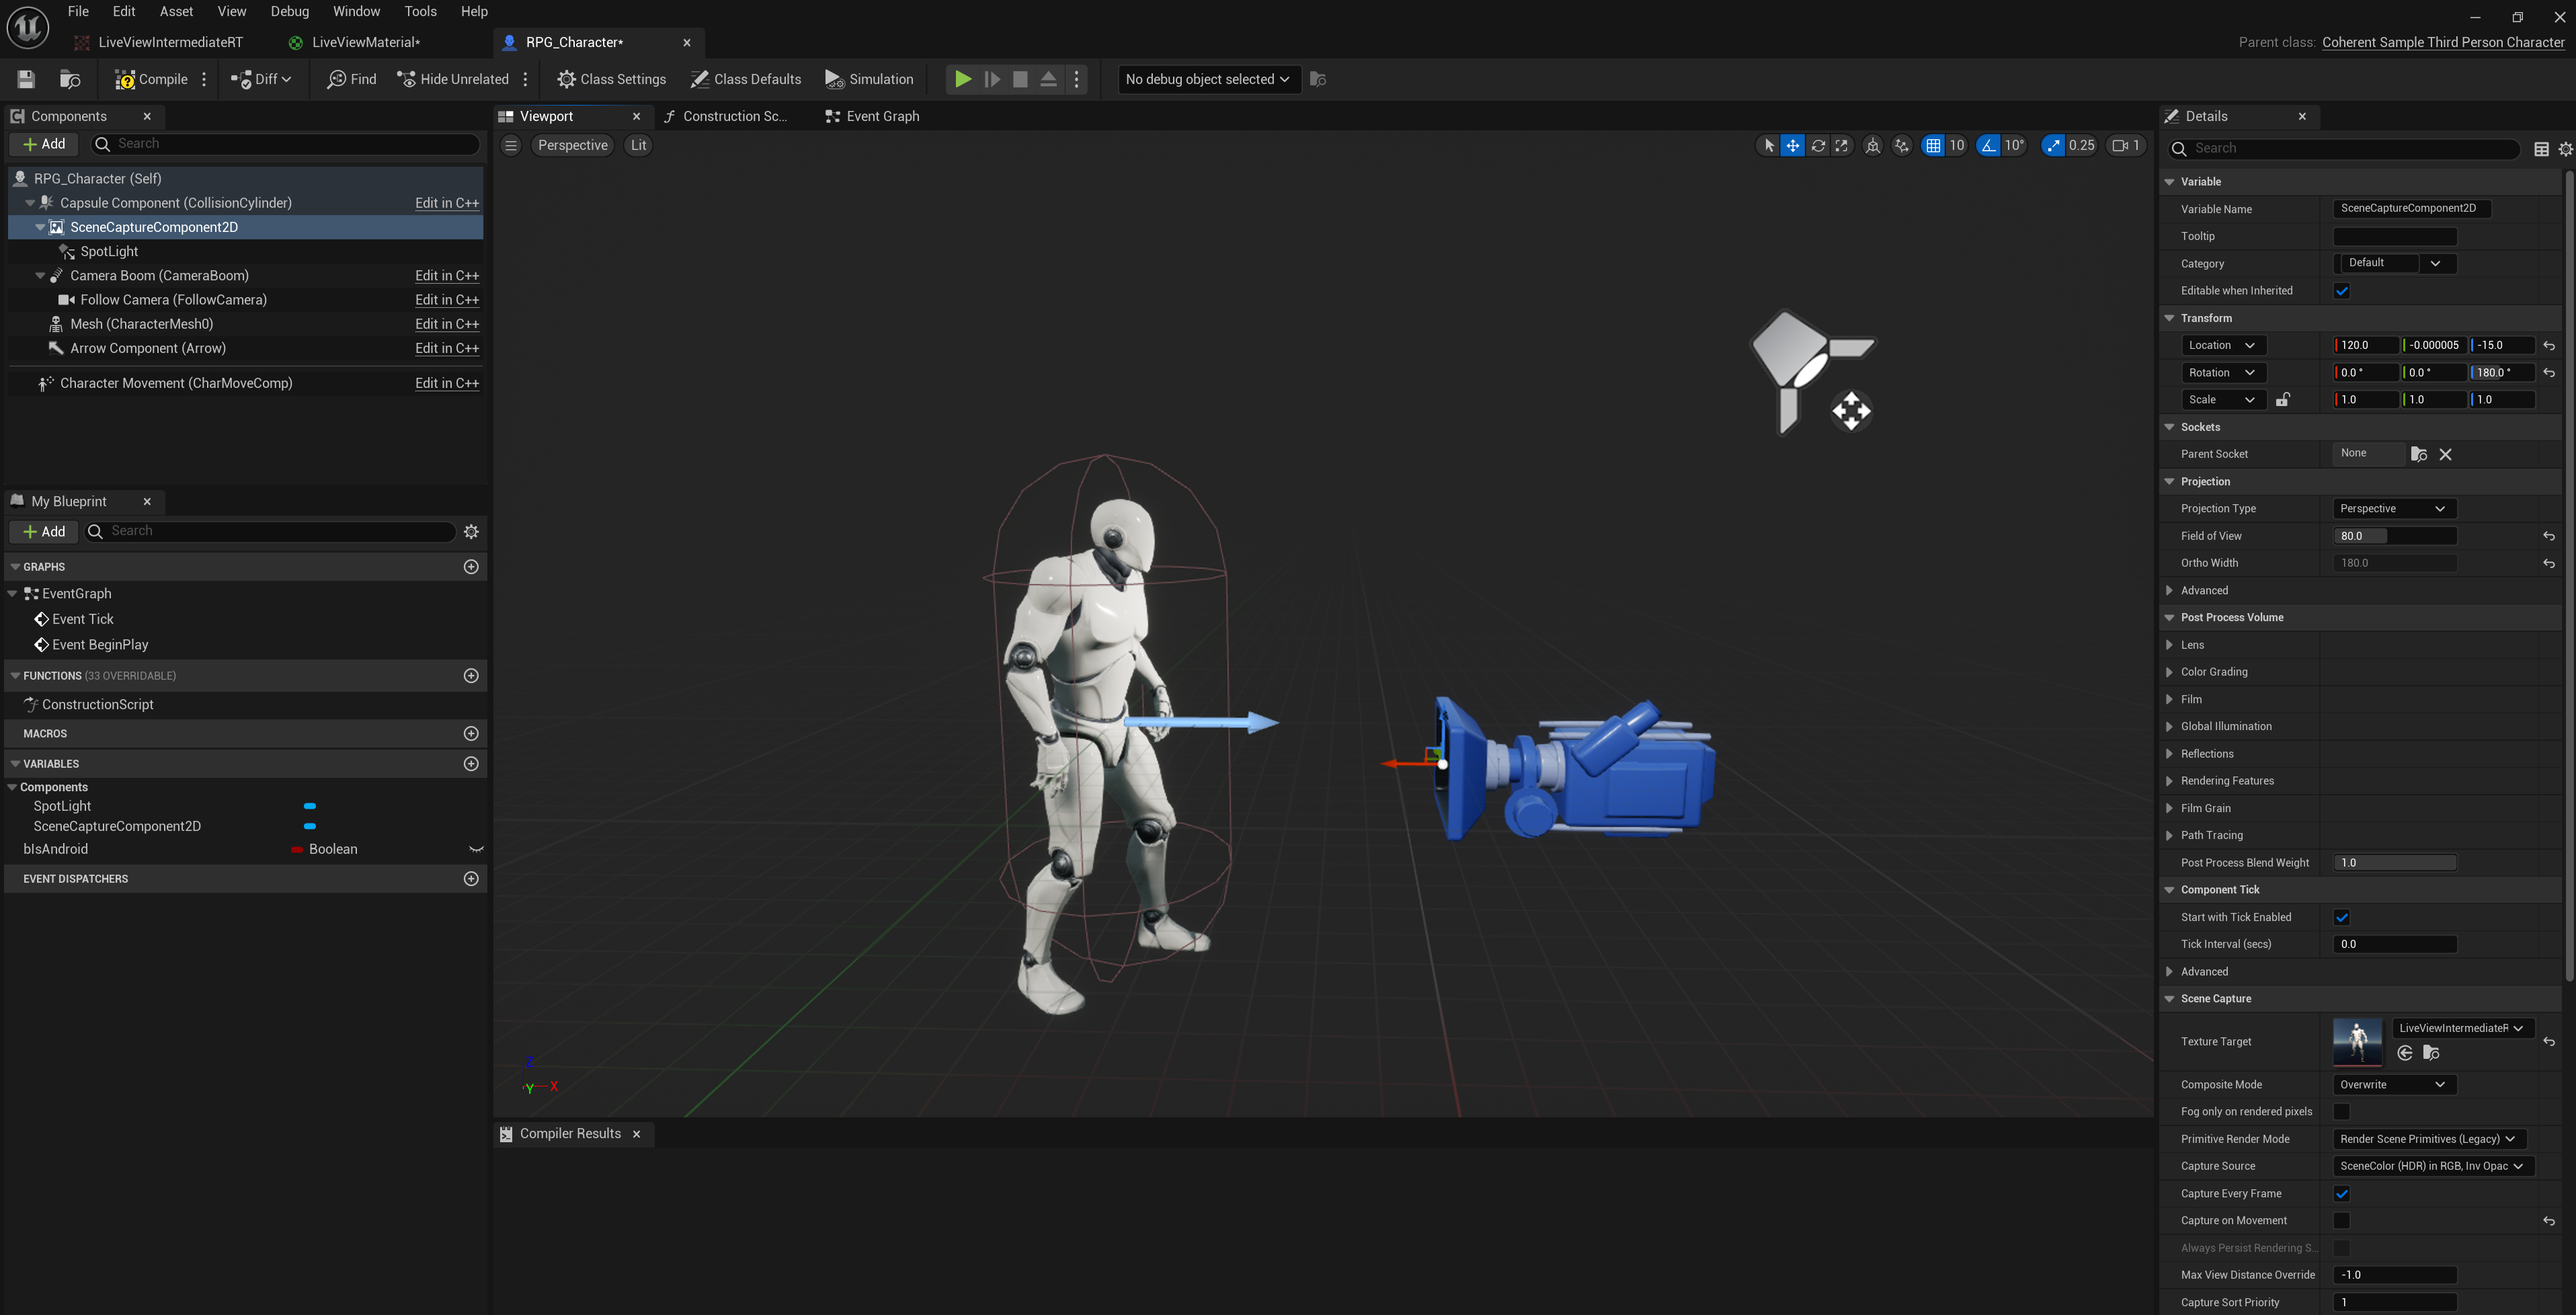
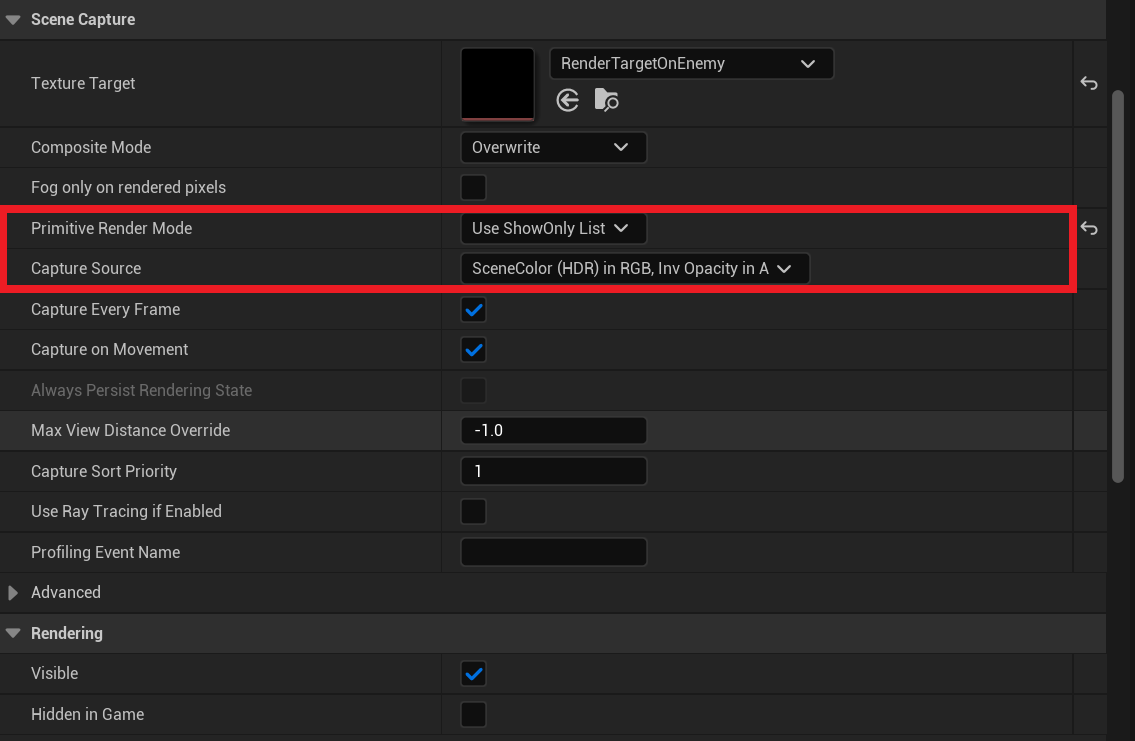
Create a TextureRender2D (e.g. RawLiveViewTexture) and pass it to the SceneCaptureComponent2D as a Texture Target. Set Capture Source to SceneColor (HDR) in RGB, Inv Opacity in A, then set the Primitive Render Mode to Use ShowOnly List. This will invert the texture and the Actor will be made transparent.
Create a Material (e.g. LiveViewMaterial) from the already created Render Target (RawLiveViewTexture). Set its Material Domain to User Interface and the Blend Mode to AlphaComposite (Premultiplied Alpha). Invert the alpha once more so that only the Actor is displayed, and the background is kept transparent.
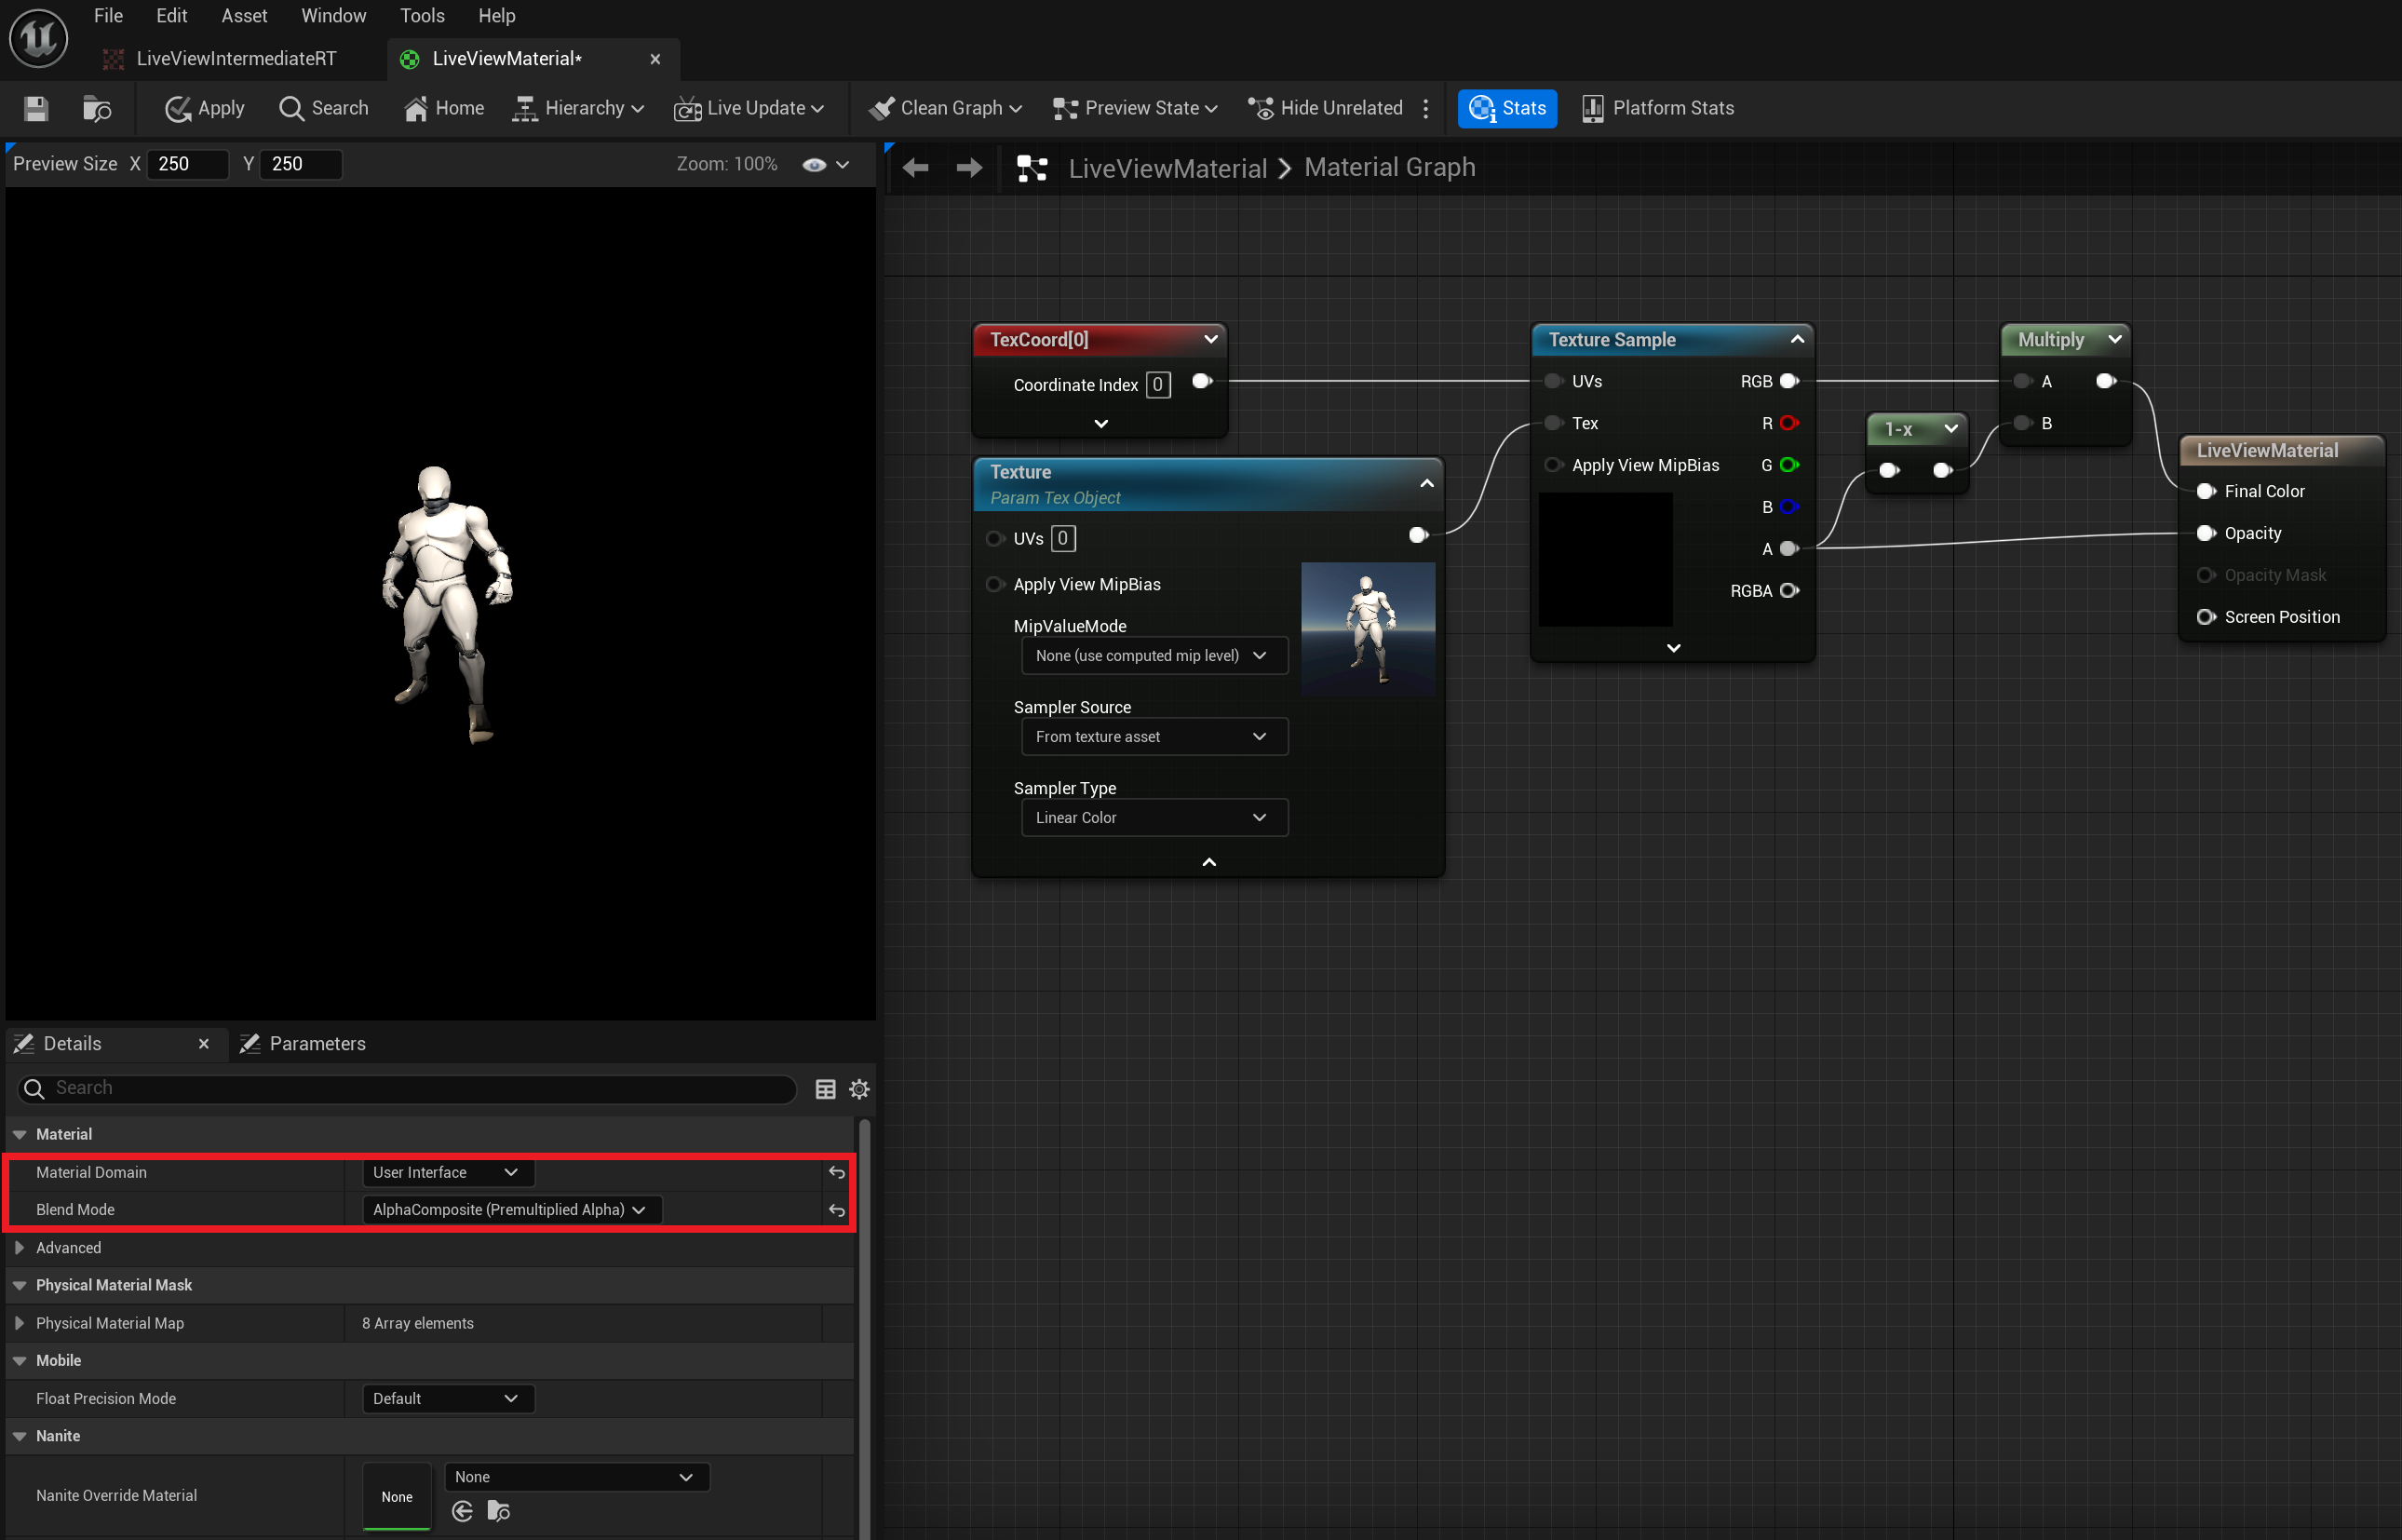
Create a new TextureRenderTarget2D texture (e.g. LiveViewRT). This will be the actual Live View used in the HTML. To populate the LiveViewRT, draw the Material (LiveViewMaterial) into the LiveViewRT texture on every tick.
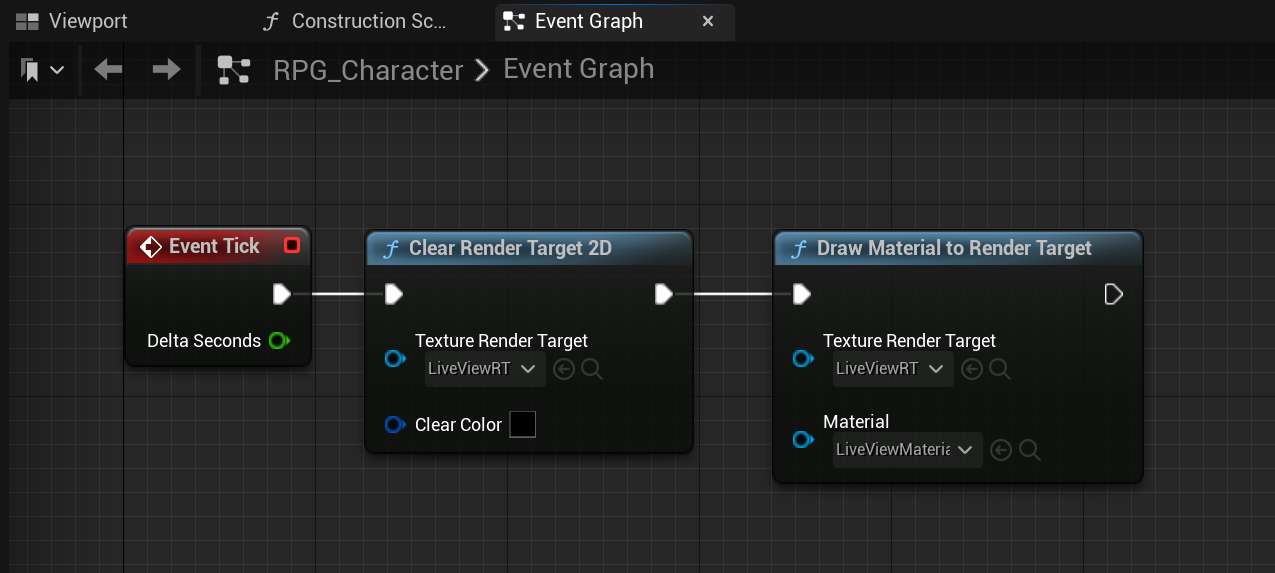
In the HTML, provide a reference to the texture from the level:
<img src="TextureRenderTarget2D'/Game/LiveViewRT.LiveViewRT'"/>
The end result should look like this:
