Quick Start Guide
This guide describes the features of the Gameface integration in Unity3D. A basic understanding of the Unity3D engine, as well as HTML/JavaScript is assumed.
Brief overview
Gameface is a modern user interface middleware solution that allows you to integrate HTML pages built with CSS and JavaScript in your game. The communication between your game and the HTML engine is done through the CohtmlUISystem component. Each HTML page is called a CohtmlView. The CohtmlView component allows you to perform operations on the page, such as resizing, navigating to a different URL, sending input events and so on.
Installation
Gameface for Unity3D is distributed as an archive for the Unity3D package manager You can import the archive into your project by following these steps:
- Open your project in Unity3D Editor.
- Extract the Gameface archive in your preferred location.
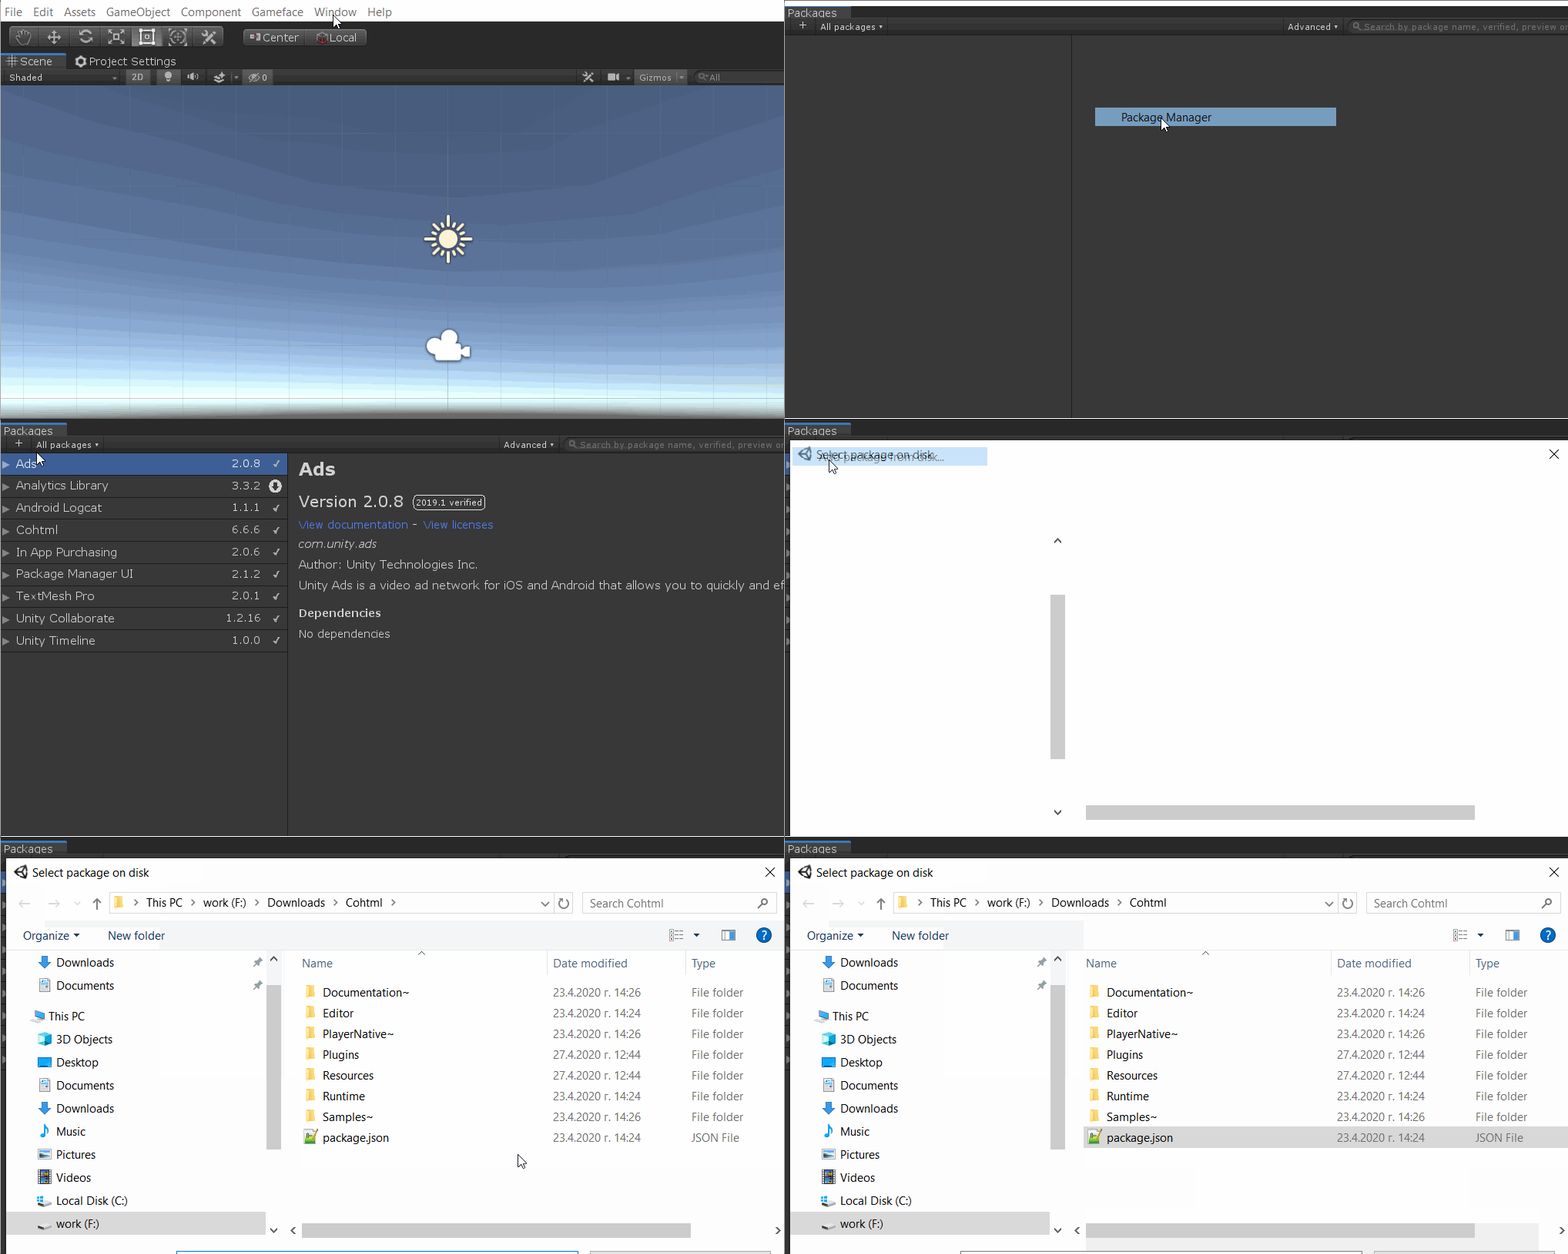
- From the menu bar choose Window -> Package Manager -> Plus sign -> Add package from disk…
- Use the file chooser dialog to navigate to the folder you extracted the archive in.
- Double click on the package.json file, located in the extracted Gameface archive.
- The Unity3D importing process should start automatically.
You can uninstall the package from Window -> Package Manager -> Project tab -> Cohtml -> Remove, or delete it manually from the Packages folder.

Trial versus Pro versions
The trial version includes a 30-day trial license key. After the key expires you won’t be able to initialize Gameface and an error message will be logged in the console.
The pro version requires entering your license key first. The license key is located at [CohtmlUPMPackage]/Runtime/Detail/License.cs. You should’ve received this file already prefilled with your license key when you purchased the pro version. Replacing the existing empty License.cs file from the package with the provided one will activate Gameface.
Adding a View to your scene
In Gameface there are two types of views - Screen and World. The first is generally used for HUDs and menus positioned in screen space, while the latter can be used for in-game UI elements placed in the 3D world. To give you an idea of how to add such views to your project, check the examples below.
Screen View
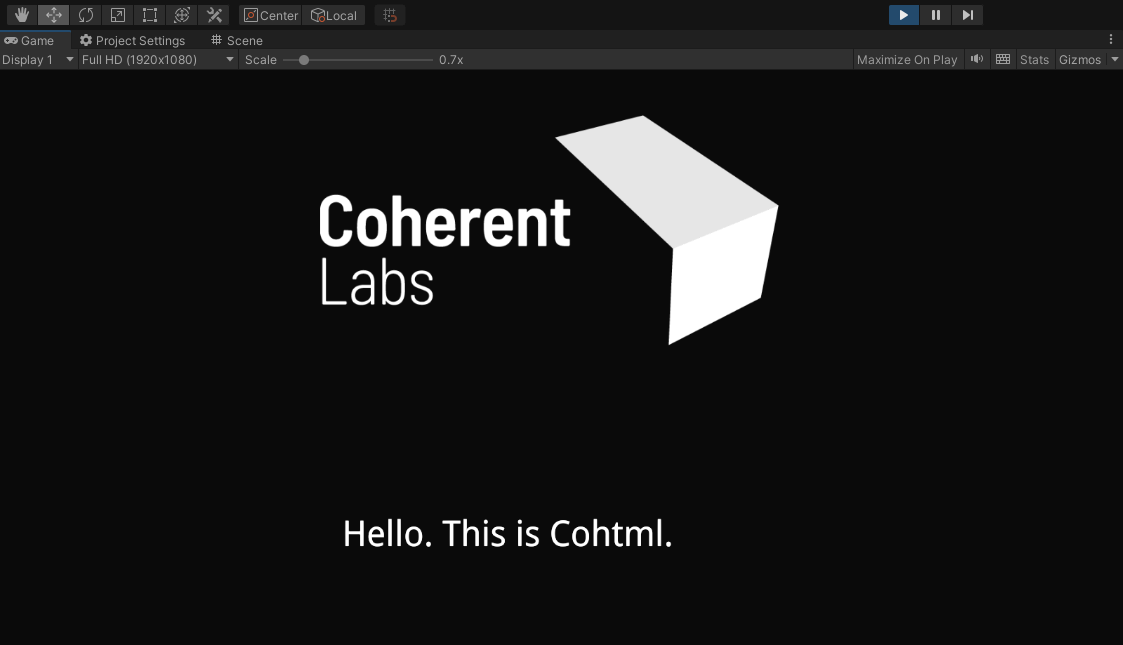
To add a Screen view to your scene, you can navigate to the Gameface/Add Screen View context menu. This will add a CohtmlView component to the Main Camera object in your scene which we will use to render the HTML page. By default, the CohtmlView component will display the Hello.html page, but you can also assign your own HTML file by modifying the URL property of the CothmlView component. Finally, you can click the Play button to start the scene and you should see the following result:

World View
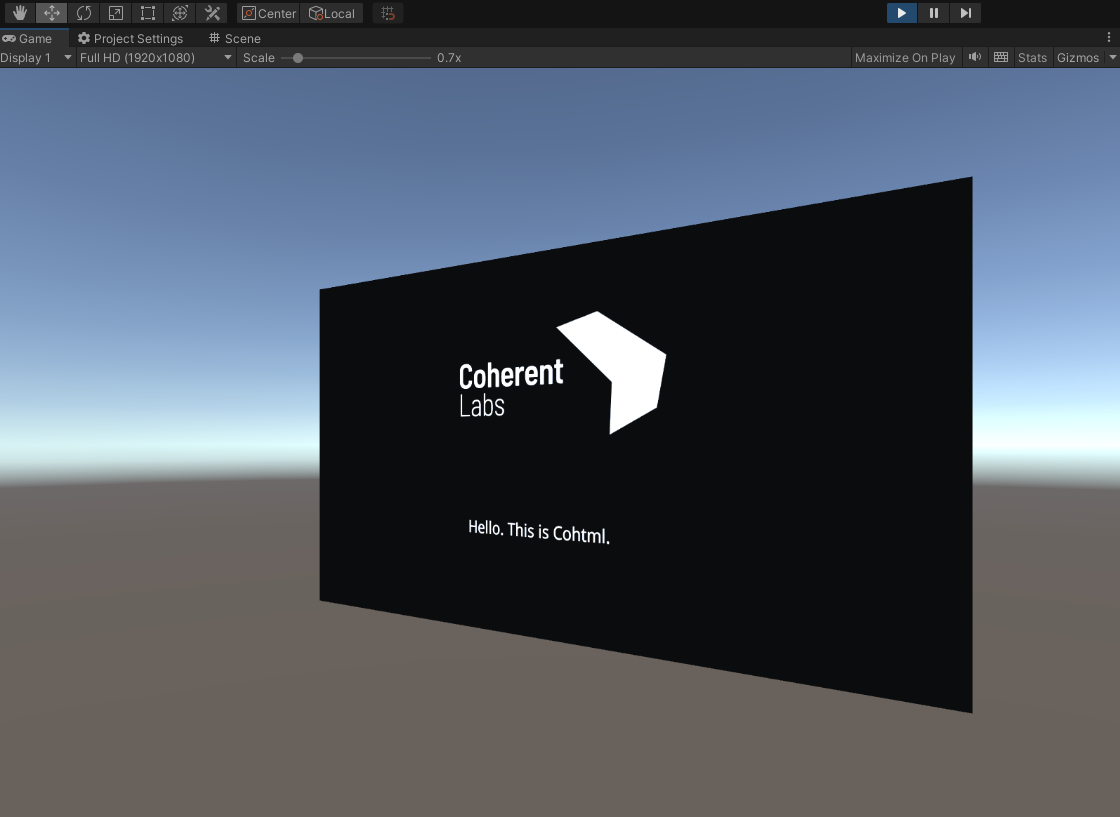
Adding a World View to the scene works in a similar manner. Navigate to the Gameface/Add View context menu which will create a new game object in your scene named CohtmlWorldView and add the CohtmlView component along with other Unity3D components required to render the View in the 3D world. Before hitting the Play button, make sure the CohtmlWorldView game object is positioned within the view frustum of your Camera. The final result should look like this:

View in UnityUI Canvas
It is also possible to render your CohtmlView component by adding it inside of a Canvas UI object. For more information and examples on how to achieve this, please check the UnityUI and CohtmlView page from our documentation.
Samples
Gameface comes with several predefined example scenes, showcasing some of the features and capabilities of the product.
To quickly access and explore all available samples, use the Sample Hub. Importing the Sample Hub sample will import all samples at once automatically and start exploring any sample of your choice.

Importing specific samples
If you prefer to import individual samples:
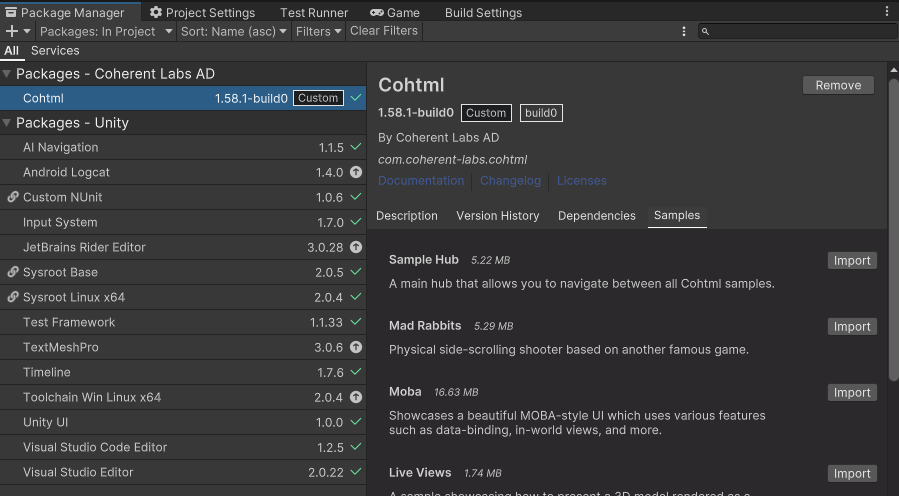
- Open the Package Manager tab in Unity3D editor.
- Select the Cohtml package.
- Open the Samples tab.
- Click
Importon any sample you want.
Other than through the SampleHub importation, you can also import all samples automatically via ContextMenu -> Gameface -> Samples -> Import All Cohtml Samples. This will import all samples and organize the UI resources in separate folders under StreamingAssets/Cohtml/UIResources/.
StreamingAssets/Cohtml/UIResources/[sample-name].Inside the package’s samples, you can find the ‘Hello’ template front-end package, which can serve as a starting point for creating a new front-end page. If you want to import it, you can use ContextMenu -> Gameface -> Samples -> Import Hello Template. Additionally, every time you add a new CohtmlView component, you will be prompted in a dialog box asking if you want it to be included.
Inside the package’s samples, you can also find the uiresources folder, located inside the ‘Samples~’ folder, where you can discover numerous sample web pages to help you speed up the UI development process. To import them automatically, you can use the button from ContextMenu -> Gameface -> Samples -> Import Frontend Samples. This operation will move the folder to your project at the location Assets/StreamingAssets/Cohtml/FrontendSamples/UIResources/. From there, you can then attach each page to the desired CohtmlView in your scenes.
If you use any of our samples in an URP project, please make sure to transition the sample materials from the Standard shaders to the URP ones. You can achieve this using the options in ContextMenu -> Edit -> Render Pipeline -> Universal Render Pipeline or Window > Rendering > Render Pipeline Converter based on the Unity3D and URP package version you’re using. For more information, you can refer to this and this page from the Unity3D documentation.
Remove samples from the UPM package
If you want to delete the Gameface example scenes automatically, you can navigate to ContextMenu -> Gameface -> Samples -> Remove Cohtml Samples from project. That action will remove only the Cohtml samples assets:
- From
Assets/Samples. - From
Assets/StreamingAssets/Cohtml/UIResources. - Samples’s Included scenes in Build settings.
Remove samples will not remove any additional resources from Assets/StreamingAssets/Cohtml/UIResources, other than the ones used in the samples.To delete all samples resources manually navigate to the specific sample locations and deleting all files.
- UPMPackage/Samples~ - Contains Unity3D assets and HTML resources for all samples.
- UPMPackage/Resources/Cohtml/SharedImages/ - Preloaded images location. Remove all files in the folder, except for the ones you have placed there.
- UPMPackage/Resources/Fonts - Preloaded fonts location. Remove all files in the folder, except for the ones you have placed there.
- UPMPackage/Editor/ResourcesImporter.cs. - Script that automatically imports the samples after being added via UPM.
- UPMPackage/package.json - Contains a list of JSON samples in an array, which uses the UPM API to import each sample individually. To avoid displaying them at all, you can delete only the sample array object in the JSON.
You can delete all samples permanently from the Cohtml Unity3D integration package from the project and the package, as use ContextMenu -> Gameface -> Samples -> Permanently delete Cohtml samples. After completing this operation, all files will be deleted. To restore the samples, you will need to re-import them from the provided Cohtml UPM package.
What next?
You can continue with a deeper exploration of Gameface product capabilities by moving on to the Extended Guide.