

React Data Binding
React with Prysm Data Binding
React’s data binding can be replaced with the native data binding in Prysm which can improve performance.
The dynamic data binding in Prysm re-evaluates data-bind-* attributes on elements which values can change or if attributes are added or removed from that elements. Also if new elements get added to the page with those attributes.
React Support: JS React support
Dynamic Data Binding overviewSample Overview
Section titled “Sample Overview”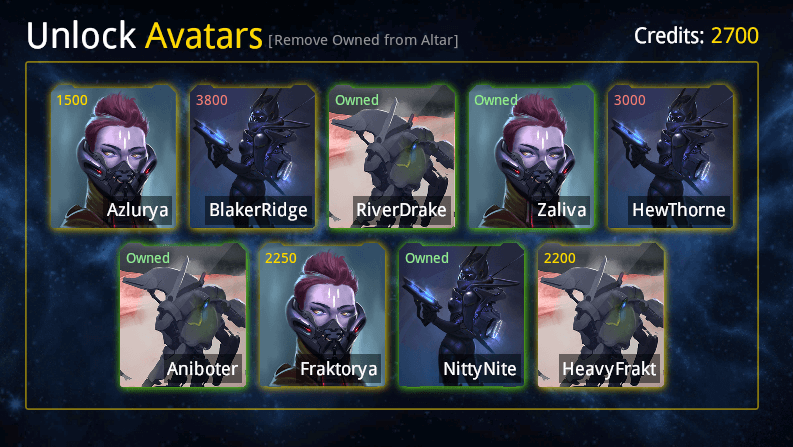
The page shows a list of items that are interactable. The list itself is generated by React. Upon clicking on an item, the price is subtracted from the total amount of Credits and the item is bought if there are enough Credits. The price element gets replaced with another “Owned” element. If there are not enough Credits to buy some of the items, the price element receives an additional CSS class that colors the price in red. Next to the “Unlock Avatars” text, there is a button that will remove the already bought items.
Everything except for the generation of the list of items is done with data-bind-* attributes within React Components.
In this example, the use of the React state is replaced with the Prysm data binding which is optimized natively. Prysm data binding handles changes to the model and updates it while React is used only once to populate/re-generate a list of items.
Running the Sample
Section titled “Running the Sample”To run the sample you need to:
- Install the required npm packages
- Configure Prysm to load from the destination.
-
Navigate to the sample folder which is included in the package in
\Samples\uiresources\ReactDataBindingfolder. -
Open a CLI in the folder and run
npm install. -
Then run
npm run watchwhich will start a watch server onhttp://localhost:3000orbuildwhich will build the sample in the dist folder. -
In the package root folder locate the Player.bat file, open it in edit mode and set
--url=to loadhttp://localhost:3000. When starting the Player.bat, it will start directly from that URL and load the page from it every time.
You can alternatively drag and drop the index.html from the dist folder after launching the Player from Player.bat.
Sample Specifics
Section titled “Sample Specifics”The first step is to include cohtml.js which is in the src folder and import the required model which is created using engine.createJSModel('Player', modelDataObject)
Rendering of the main App should be done after ensuring that the Player model has been created.
engine.whenReady.then(() => { ReactDOM.render(<App />, document.getElementById("root"));});The App will render the AvatarList Component which needs 2 things - the model object that is available globally and the array of items to be populated as a string:
<AvatarList model={Player} modelpropitems={'Player.inventory'}></AvatarList>The AvatarList Component will synchronize the models once upon mounting.
Since the model is now passed to the Component, the array of items / <Avatar>s can be generated:
const inventoryItems = Inventory.map( (item, i) => ( <Avatar key={i} index={i} modelitem={item} model={model} {...rest} ></Avatar> ));and then render the items themselves from React:
<div className={'avatar-list'}> {inventoryItems}</div>Now everything needed for the Avatar Component to be used with data-bind-* attributes is available through its props.
For example to set the name of the avatar and show the “Owned” label when an Avatar is bought:
<div className={'avatar-name'} data-bind-value={`{{${props.modelpropitems}}}[${props.index}].avatar.name`} ></div>
<div className={'avatar-owned-label'} data-bind-if={`{{${props.modelpropitems}}}[${props.index}].avatar.owned`}>Owned</div>
The modelpropitems was passed from <AvatarList>.
Force render AvatarList Component
Section titled “Force render AvatarList Component”Since React renders the list of items and it doesn’t know when the Player model gets changed, a force rendering of that component is required.
A custom hook is created in a separate file so it can be imported/reused where it is needed:
export const useForceRender = () => { const [, setRerender] = useState('');
 // Dummy - force re/render const setForceRender = () => {   setRerender({}); };
 return setForceRender;};
Now, to filter all items that are not “owned” from the Player model’s inventory array and re-render the List component:
const removeOwned = () => { // Use filter method so React recognizes that there is a need for update. model.inventory = Inventory.filter(((el)=>!el.avatar.owned)); cohtmlModelUpdater.updateModel(model); forceRender();};Now, this can be called by clicking the “Remove Owned from Altar” button.
© 2026 Coherent Labs. All rights reserved.