

Grapesjs
GrapesJS is a web builder framework. It allows you to quickly build an HTML page using only drag and drop. You can use grapes to create the UI of your game and preview it directly in Prysm.
Requirements
Section titled “Requirements”- node
v10.16.3 - http-server
v0.11.1or an http-server of your preference
Getting Started
Section titled “Getting Started”- Navigate to the grapesjs demo folder and run npm install
- After the installation finishes run node
server/server.jsIf the server starts correctly you’ll receive a message:listening on *:3000 - After that start a local HTTP server by running: http-server
- Open a browser and go to
http://localhost:<port>/index.htmlThis will take you to the GrapesJS editor. - Open
preview/preview.htmlin Prysm. Edit something in the editor - the preview will automatically update.
How it Works?
Section titled “How it Works?”We use a websocket server to send changes detected in the editor to the preview. The preview updates itself. If the change is minor - for example, an attribute change - we update the element inline. If the change is major - like instantiating a new component - we do a full page reload to make sure that everything is properly initialized.
Detecting Changes and Sending Them to the WS Server
Section titled “Detecting Changes and Sending Them to the WS Server”GrapesJS API provides a rich amount of events fired when various changes occur. These events are the life cycle hooks of the components. We utilize as much as we can from them in order to detect and differentiate changes. There are global and local hooks. The global hooks are fired whenever a component on the scene changes. The local hooks are specific to a certain component instance. We use the local hooks for most of the minor changes - classes and attributes. We use the global hooks for major changes - added/deleted components and as a fallback option if the local hook fails.
editor.on('component:add', updateContent);editor.on('component:remove', updateContent);updateContent simply gets the current source of the page and sends it to the WebSocket server. The server saves the new changes to the preview and broadcasts to the preview and all connected clients that the change has occurred.
updateContent:
function updateContent(model, prev, next) { let css = editor.getCss(); let js = editor.getJs(); let html = ` <style>${css}</style> <body> ${editor.getHtml()}</body> ...`;socket.emit('save-file', 'preview.html', html);}sever.js
socket.on('save-file', (fileName, content, callback) => { saveFile(fileName, content, callback); socket.broadcast.emit('content-updated');});The preview is registered for the content-updated event and when it receives it - it updates itself:
socket.on('content-updated', () => { location.reload();});This is how the full reload update is achieved. The inline or partial update is a little more complicated.
In order to do an inline update, we need to be able to properly identify the changed element as well as the changes. As mentioned already, to do so we use the local life cycle hooks of the component. In the updated hook we receive the property type (classes, attributes etc… ), its current value and its previous value.
updated(property, value, prevValue);Knowing the property type and the value allows us to send proper updates to the preview. We can get and/or format any additional information that we need here and trigger an update event:
editor.trigger('partial-update', this, property, this.getChangedAttributes(prevValue, value));Additional formatting is needed in almost all of the cases as GrapesJS sends the value in its own format. We need to simplify the data as much as possible to a primitive JS type such as string which can directly be put into the preview’s HTML.
Notice that we trigger the event on the editor. This is done to avoid introducing the WS server to the component definition. The communication between the WS server and GrapesJS is established through editor.js where we have:
editor.on('partial-update', partialUpdate);And partial update simply sends the data to the WS server
function partialUpdate(model, property, value) { const id = model.getId(); socket.emit('partial-update', model, property, value, id);}Creating Custom Components and Exposing data binding Attributes
Section titled “Creating Custom Components and Exposing data binding Attributes”In order to use the updated function of a component, we need to create a new component type and pass it a model which implements the updated life cycle hook. This is done using GrapesJS API for creating components:
const nameplate = editor => { editor.DomComponents.addType('nameplate', new Nameplate());};The Nameplate instance should have a model property which is the definition of the new component. The model should hold the implementation of the updated callback. This is a model template. It can be used to create multiple components that have the same properties, but different structures.
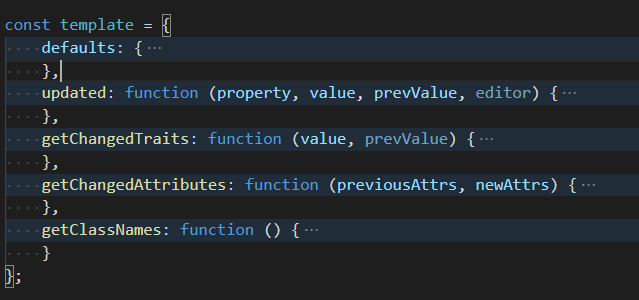
Notice that all additional helper functions are also in the model.
The traits of the component in GrapesJS define different parameters and behaviors of a component. They are described in the model definition. Add any data-binding property that you need to be able to edit:
const GamefaceComponent = { defaults: { tagName: 'div', traits: [ 'id', 'data-bind-value', 'data-bind-if', 'data-bind-for', ], }};To be able to use the new component you need to add it to the list of plugins:
const editor = grapesjs.init({ container: '#gjs', plugins: [ 'gjs-preset-webpage', 'grapesjs-custom-code', 'grapesjs-tabs', nameplate, imageWrapper, ]});Adding New Components to GrapeJS Blocks
Section titled “Adding New Components to GrapeJS Blocks”A Block is a group of Components. It is located on the right panel of the editor.
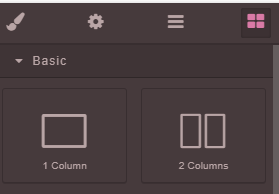
You need to add the new components to the blocks in order to be able to use them in the editor. This is how to do it:
blockManager.add('nameplate', { label: 'Nameplate', attributes: {class: 'fa fa-window-minimize'}, content: {type: 'nameplate'}, activate: true, type: 'default', select: true,});You specify the name of the block, the name of the component and some additional information regarding the style of the block.
Using Images in GrapesJS
Section titled “Using Images in GrapesJS”The asset manager in grapes by default encodes images in order to embed them in the browser. Encoded images will not be displayed in Prysm. We recommend using a custom component that allows the usage of images via the background-url CSS property. Here’s a simple example of such a component:
const imageWrapper = editor => { editor.DomComponents.addType('image-wrapper', { isComponent: el => { if (!el || !el.classList) return false; return el.classList.contains('image-wrapper'); }, model: { defaults: { name: 'image-wrapper', tagName: 'div', classes: ['image-wrapper'], attributes: {}, } }, });};You can use a default div element, but having a dedicated element helps with the component management on the scene, especially in big and complex scenes. We need to expose the image-related CSS properties in the style manager. The style manager is accessible through the brush icon on the right panel:
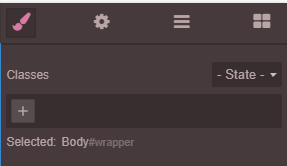
To expose new style properties, you need to add a new sector to the style manager, similar to how we add new blocks to the block manager:
var sector = styleManager.addSector('Background-Image',{ name: 'Background Image', open: true, buildProps: [ 'width', 'height', 'background-size', 'background-color', 'background-repeat', 'background-position' ], properties: [ { property: 'background-image'}, ]}, { at: 0 });Adding these styles to the style manager exposes them to all elements. If you don’t want to use a dedicated component for images just apply the image styles to whichever component you’d like.
This is all you need in order to get started with grapes and even add some custom behavior. To summarize:
index.htmlis the main page on which grapes are displayedpreview.htmlis the preview page which is automatically updatedserver.js isthe WebSocket server that sends updates from grapes to the previeweditor.jsis the GrapesJS instance - configuration, blocks, style sectors, and event listeners are handled here- Prysm specific data-binding properties are exposed through the traits of the components
- Images are used via the background CSS property
© 2026 Coherent Labs. All rights reserved.